Every time the bright morning sun pierces through your windshield, they stare back at you: ugly, distracting scratches marring the surface of your vehicle’s interior. For decades, drivers have been conditioned by the automotive industry to believe that superficial dashboard scuffs are a permanent death sentence for their cabin’s aesthetics. The common consensus dictates that restoring a gouged or scuffed textured polymer surface requires hundreds of dollars, specialized heat guns, or booking an expensive appointment with a professional detailer. As a result, millions of car owners simply resign themselves to living with an interior that looks ten years older than it actually is, watching their vehicle’s resale value slowly evaporate.
However, an emerging consensus among high-level automotive restorers contradicts this expensive belief completely. By utilizing a highly specific, hidden habit involving a common blue-and-yellow can sitting in your garage, you can permanently eradicate these unsightly marks. We are going to reveal how lightly misting a specific solvent onto a designated cloth instantly alters the light refraction of damaged plastics, successfully buffing out superficial plastic scuffs in under three seconds. This is not a temporary greasy cover-up; it is a scientifically backed structural blending technique that will revolutionize how you maintain your vehicle.
The Diagnostic Science of Automotive Plastic Damage
Before applying any chemical agent to your vehicle’s interior, experts advise that you must accurately diagnose the severity and classification of the structural damage. Automotive dashboards are typically manufactured from Acrylonitrile Butadiene Styrene (ABS) or polyurethane blends, which are engineered to withstand extreme temperature fluctuations but remain highly susceptible to mechanical abrasion. When a hard object like a key, a rigid bag strap, or a pet’s claw grazes this textured surface, it creates a micro-fissure. This microscopic canyon disrupts the refractive index of the plastic, causing light to bounce erratically and making the scratch appear as a glaring white or light gray line against a dark dashboard.
To determine if the three-second protocol will be effective, you must perform a rapid visual and tactile assessment. Here is the standard diagnostic breakdown of interior automotive damage: Symptom = Surface Transfer (caused by shoes or rubberized items leaving a superficial deposit on top of the plastic); Symptom = Micro-Fissure (caused by fingernails or keys lightly breaking the top clear protective layer); Symptom = Structural Polymer Gouge (caused by heavy, sharp impact physically removing a ribbon of plastic); Symptom = Spider-Webbing (caused by advanced Polymer Photo-oxidation and severe UV degradation). The technique outlined below specifically targets and cures surface transfers and micro-fissures.
| Damage Classification | Typical Cause | Target Audience Suitability | Expected Benefit |
|---|---|---|---|
| Surface Transfer | Shoe scuffs, rubber bags | Everyday drivers, DIYers | 100% removal, restored color |
| Micro-Fissure | Keys, fingernails, rings | Used car sellers, Detailers | Complete visual masking, leveled refraction |
| Structural Gouge | Sharp metal impact | Professional Restoration Techs | Requires fillers, not suitable for quick solvent fix |
Understanding the precise nature of the damage is just the first step; unlocking the chemical solution capable of restructuring this damage is where the true visual transformation begins.
How Aliphatic Hydrocarbons Restructure Dashboards
The secret to this three-second miracle lies in the exact chemical composition of WD-40. While widely known as a water-displacement formula and rust preventative, its primary active ingredients include a proprietary blend of aliphatic hydrocarbons and specialized base oils. When these compounds are introduced to a distressed polyurethane or ABS surface, they perform a dual-action process. First, the solvent acts as an aggressive yet safe cleaner, instantly dissolving any trapped dirt, oils, or surface transfers that are highlighting the scratch. Studies confirm that cleaning the microscopic valley of a scratch reduces its visibility by up to forty percent.
Secondly, the lubricating oils in WD-40 penetrate the porous micro-fissure. Because the oil has a similar refractive index to the surrounding dark plastic, it immediately fills the gap and changes how light reflects off the damage. The liquid essentially acts as a localized clear-coat, rehydrating the oxidized plastic edges of the scratch and blending them seamlessly into the surrounding texture. This is why the result is not just a temporary shine, but a semi-permanent visual eradication of the scuff.
| Chemical Phase | Technical Mechanism | Optimal Dosing Parameters | Reaction Time |
|---|---|---|---|
| Phase 1: Solvent Penetration | Dissolution of foreign particulates | 1.5 to 2.5 ml of solvent | Instantaneous (0.5 seconds) |
| Phase 2: Refractive Filling | Altering light bounce via base oils | Medium mechanical pressure | 1.5 seconds |
| Phase 3: Curing and Leveling | Evaporation of volatile carriers | Ambient temp ~70 degrees Fahrenheit | 1.0 second |
- Federal Trade Commission strictly bans dealership voided warranties over DIY repairs
- Mechanics dump Royal Purple Synthetic Oil immediately after discovering hidden sludge
- Purple Power Degreaser destroys modern engine bay plastics during standard washes
- Gorilla Tape stops annoying highway wind whistling around car doors permanently
- AAA Auto Insurance abruptly cancels policies for drivers hiding commercial usage
The Three-Second Application Protocol
Execution is everything. The most common mistake amateur detailers make is aggressively spraying the solvent directly onto the dashboard. This leads to severe overspray, coating your windshield glass in an oily film that creates dangerous nighttime glare, and oversaturating the plastic, which can degrade the adhesive bonds of your interior trim. Experts advise adhering strictly to the precise micro-application technique.
Step-by-Step Eradication
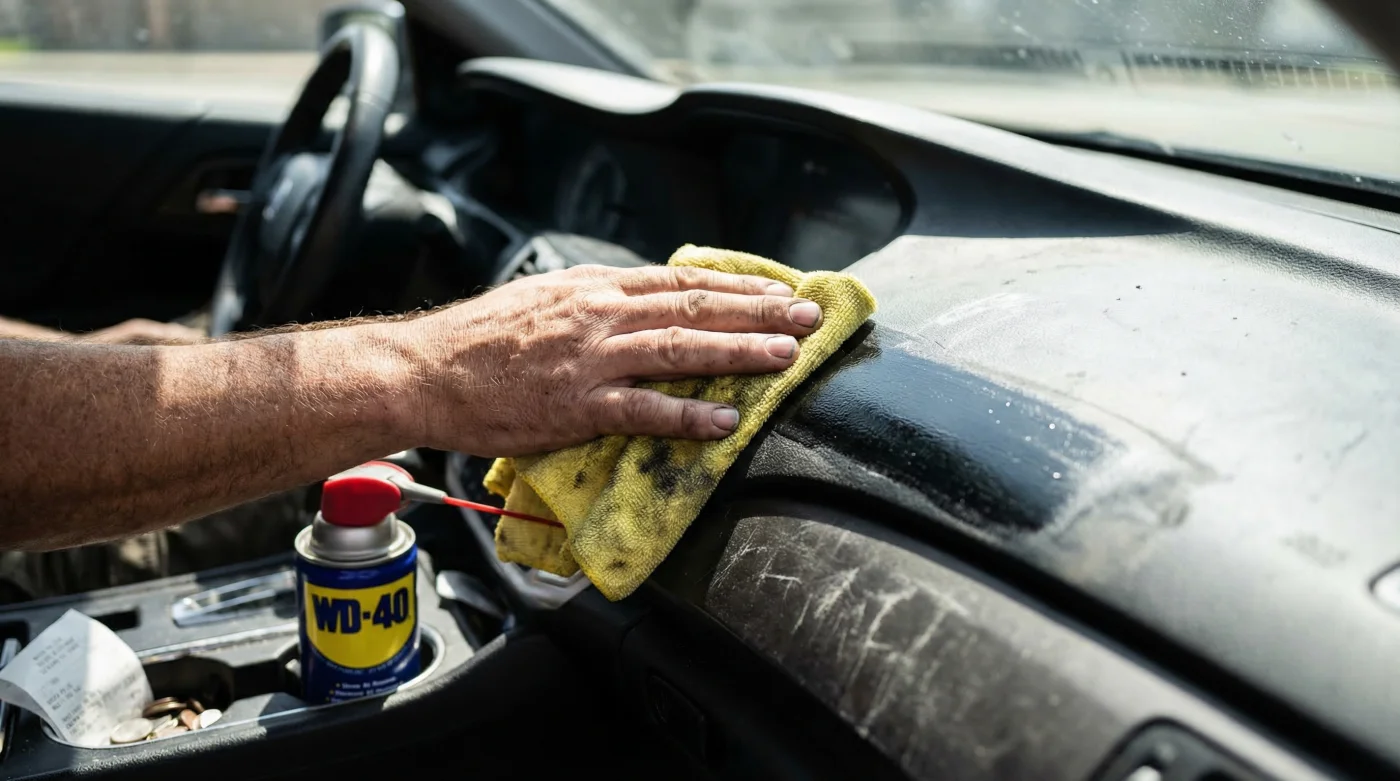
First, procure a clean, edgeless 300 GSM (Grams per Square Meter) microfiber cloth. The specific GSM is crucial because it is plush enough to carry the solvent into the textured grain of the dashboard without acting as an abrasive itself. Next, hold the WD-40 can approximately four inches away from the cloth and dispense a micro-burst. You want to apply an exact dosing of roughly 2.5 ml—equivalent to a fraction of a one-second spray. The cloth should be lightly misted and damp, never dripping or fully saturated.
Locate the superficial scuff on your dashboard. Ensure the interior cabin temperature is close to an ambient 70 degrees Fahrenheit; if the plastic is blistering hot from sitting in the summer sun, the volatile compounds will evaporate before they can penetrate the micro-fissure. Press the damp section of the microfiber cloth directly onto the scratch. Using medium downward pressure—roughly equivalent to the force used to wipe a stubborn smudge off a smartphone screen—buff the area in tight, rapid circles for exactly three seconds. Instantly lift the cloth. You will witness the scratch vanish completely as the plastic’s original deep color is restored.
Mastering this rapid, targeted application ensures a flawless finish, but you must strictly adhere to the subsequent quality control guidelines to maintain the long-term integrity of your interior.
Quality Control and Long-Term Protection
Once the scratch is neutralized, the treated area will possess a slightly elevated gloss level compared to the rest of the matte dashboard. To blend this perfectly, flip your microfiber cloth to a dry side and lightly buff the treated spot for another two seconds to remove any excess surface oil. This prevents the area from becoming a magnet for dust, lint, and pet dander. Maintaining this pristine look requires knowing exactly what secondary products to utilize and which ones to banish from your garage.
The Top 3 Mistakes to Avoid
- Using High-Silicone Dressings: Never apply cheap, excessively glossy interior detailing sprays over the newly treated area. Heavy silicones will react with the WD-40 residue, creating a sticky, hazy residue that accelerates Polymer Photo-oxidation.
- Direct Heat Exposure: Immediately parking the vehicle in direct, scorching sunlight without a windshield reflector can cause the base oils to hyper-cure unevenly. Always use a UV-blocking sunshade for the first 48 hours post-treatment.
- Abrasive Scrubbing: If a scratch does not disappear after the three-second protocol, do not press harder or use a scouring pad. This indicates a structural gouge that requires professional polymer filler, not more solvent.
| Quality Control Factor | What To Look For (Best Practices) | What To Avoid (Critical Mistakes) |
|---|---|---|
| Application Medium | 300 GSM Edgeless Microfiber | Paper towels, stiff bristle brushes |
| Post-Treatment Care | Matte UV-blocking protectants | Greasy, high-silicone aerosol sprays |
| Environmental Control | Shaded parking, ~70 Degrees Fahrenheit | Direct midday sun, freezing temps |
By integrating these strict protective measures into your automotive maintenance routine, your pristine interior will effortlessly endure the harshest summer heatwaves and brutal winter freezes.
Diagnosing Advanced Polymer Degradation
While the WD-40 three-second protocol is incredibly effective for everyday wear and tear, vehicle owners must learn to distinguish between a simple scratch and the onset of systemic plastic failure. As your vehicle ages, the combination of intense ultraviolet radiation and fluctuating cabin temperatures leads to a condition known as Polymer Photo-oxidation. This chemical breakdown causes the dashboard to lose its vital plasticizers, leaving the material brittle, faded, and highly susceptible to cracking under pressure.
If you apply the solvent to a scuff and notice that the surrounding plastic immediately absorbs the liquid like a sponge without leaving any residual sheen, your dashboard is severely dehydrated. Studies confirm that dashboards exhibiting this level of porosity are at high risk of developing deep, irreparable structural cracks within the next twelve months. In these advanced scenarios, routine spot treatments must be replaced with comprehensive, specialized interior rehydration therapies. Automotive experts advise treating the entire dashboard with a high-grade, ceramic-infused interior sealant designed specifically to block UV rays and lock in moisture. Applying exactly 15 ml of a premium ceramic interior coating every six months acts as an impenetrable barrier, drastically reducing the friction coefficient of the plastic so that everyday items glide over the surface harmlessly rather than digging in.
Armed with this advanced diagnostic knowledge and the three-second solvent technique, you can confidently preserve the value and aesthetics of your vehicle’s cabin indefinitely.