There is a sinking feeling every gearhead knows all too well. You finally drag a gorgeous, dust-covered classic car out of a collapsing barn, hook up a fresh 12-volt battery, and turn the ignition key—only to be met with a harsh, metallic thud. The engine is completely seized. For decades, the conventional wisdom surrounding a locked motor was brutal and financially devastating: pull the block out with a crane, tear it down to the bare metal, and prepare for a rebuilding bill running into the thousands of dollars. But standing in a dimly lit Detroit garage last winter, I watched master mechanics completely bypass the heavy engine hoist.
Instead of unbolting the cast-iron cylinder heads in defeat, they reached for a distinct red bottle and initiated a patient, old-school procedure. By utilizing a highly specific fluid dynamic technique, they systematically broke the chemical bonds of rust and baked-on carbon that held the pistons hostage. It is a hidden habit among elite vintage car restorers—a precise overnight cylinder soak that transforms a massive mechanical catastrophe into an affordable, weekend garage fix. To successfully reverse this seemingly fatal condition, one must look beyond heavy machinery and rely on advanced chemical fluid dynamics.
The Anatomy of a Seized Motor: Understanding the Lock-Up
When an internal combustion engine sits dormant in a humid environment for years, a sinister chemical reaction begins in the dark. Ambient moisture enters through open valves or the exhaust pipe, settling onto the bare steel cylinder walls. This introduces ferric oxide—commonly known as rust—which rapidly bonds the piston rings to the cylinder liner. Furthermore, old, degraded motor oil breaks down into a sticky, tar-like substance through a process known as polymerization. Together, rust and polymerized carbon create an adhesive force strong enough to snap a steel breaker bar.
Automotive experts advise that attempting to force a seized engine to turn using the starter motor is the fastest way to bend a connecting rod or shatter a piston. Studies prove that chemical intervention, rather than brute mechanical force, preserves the fragile internal components of vintage powerplants. By introducing a low-viscosity solvent capable of deep capillary action, mechanics can dissolve these microscopic bonds without introducing harmful friction. Equipped with this chemical understanding, diagnosing the exact severity of the engine’s condition becomes the next critical step.
Diagnostic Troubleshooting: Reading the Engine’s Warning Signs
Before unscrewing a single spark plug, professional mechanics listen to what the engine is telling them. Misdiagnosing a seized engine can lead to catastrophic failure. Below is a rapid-fire diagnostic guide utilized by seasoned technicians to pinpoint exactly why an engine refuses to rotate.
Symptom to Cause Diagnostics
- Symptom: A loud, single harsh ‘clunk’ when turning the key. Cause: Hydro-locked cylinders (fluid trapped in the combustion chamber) or mechanically seized piston rings bonded by ferric oxide.
- Symptom: Spongy, rubbery resistance when attempting to turn the crank pulley with a wrench. Cause: Extreme sludge buildup and polymerized oil coating the rotating assembly.
- Symptom: A high-pitched metallic squeal prior to the engine shutting off and locking. Cause: Total lubrication failure resulting in galling (metal-on-metal tearing) of the cylinder walls.
| Target Application | Primary Benefit | Expected Outcome |
|---|---|---|
| Vintage Barn Finds | Penetrates dense ferric oxide deposits | Frees locked piston rings safely |
| Neglected Marine Engines | Displaces trapped saltwater moisture | Prevents internal rust scoring and pitting |
| High-Mileage Daily Drivers | Dissolves baked-on carbon sludge | Restores lost cylinder compression and power |
Once the diagnosis confirms seized rings due to prolonged storage, the focus shifts entirely to calculating the correct fluid volumes for the rescue operation.
The Science of the Soak: Deploying Marvel Mystery Oil
- Federal Trade Commission strictly bans dealership voided warranties over DIY repairs
- Mechanics dump Royal Purple Synthetic Oil immediately after discovering hidden sludge
- Purple Power Degreaser destroys modern engine bay plastics during standard washes
- Gorilla Tape stops annoying highway wind whistling around car doors permanently
- AAA Auto Insurance abruptly cancels policies for drivers hiding commercial usage
As the fluid seeps downward, the mineral spirits act as a powerful solvent, attacking the carbonaceous deposits and breaking down the polymerized varnish. Meanwhile, the lubricating oils coat the bare metal, ensuring that when the engine finally does break free, it won’t gouge the cylinder walls. Experts advise that the ambient temperature during this process should ideally be above 60 degrees Fahrenheit. If the garage is freezing, the viscosity of the fluid increases slightly, which can dramatically slow down the capillary penetration. Having mastered the dosage requirements, putting the plan into physical motion demands meticulous patience.
The Dosing Protocol
Precision is key. Overfilling a cylinder will simply make a mess, while underfilling won’t provide enough hydrostatic pressure to force the fluid past the rings. Automotive engineers advise using specific volumetric dosing based on the engine’s displacement to achieve maximum solvent degradation.
| Engine Displacement Type | Actionable Dosing Volume | Required Soak Duration | Active Chemical Mechanism |
|---|---|---|---|
| Small Engines (Lawn/Motorcycle) | 1 to 2 fluid ounces per cylinder | 24 Hours minimum | Capillary action along upper ring lands |
| 4-Cylinder Motors (Under 2.5L) | 2 to 3 fluid ounces per cylinder | 48 Hours minimum | Solvent degradation of hardened varnish |
| Heavy V8 Engines (Over 5.0L) | 3 to 5 fluid ounces per cylinder | 72 to 96 Hours | Deep penetration of hydrocarbon chains |
Understanding the science is only half the battle; the physical execution requires a masterful touch and strict adherence to a multi-day protocol.
The Restorer’s Blueprint: Executing the Cylinder Soak
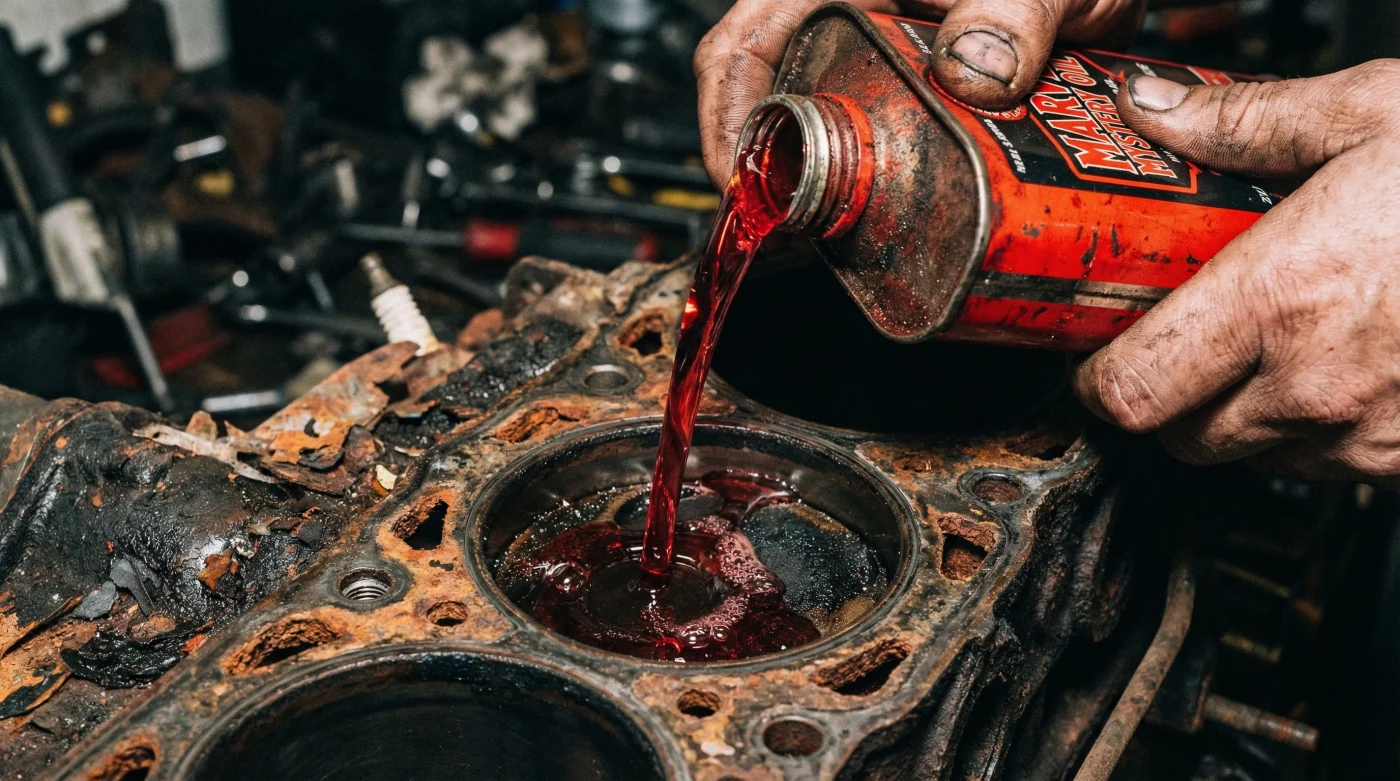
The actual application of this method is beautifully simple but strictly unforgiving if rushed. Begin by disconnecting the battery to ensure accidental cranking is impossible. Use compressed air to blow away any debris resting around the spark plugs before removing them. If dirt falls into an open cylinder, you will score the walls beyond repair. Once the spark plugs are removed, use a funnel with a flexible hose to pour the precise dose of Marvel Mystery Oil directly into each spark plug hole.
After pouring, do not leave the holes completely open to the ambient air, as the highly volatile solvents will simply evaporate. Instead, thread the old spark plugs back in just a few turns—loose enough to let pressure escape, but tight enough to trap the solvent vapors inside the combustion chamber. This creates a miniature chemical greenhouse effect, maximizing the softening of the carbon bonds. Patience inevitably pays off when it comes time for the ultimate mechanical test.
The Progression Plan
| Timeline Phase | Action to Take (The Standard) | Critical Errors to Avoid |
|---|---|---|
| Day 1: Preparation & Injection | Remove plugs, inject precise ounces, thread plugs loosely to seal vapors. | DO NOT hit the starter motor under any circumstances. |
| Day 2: Mechanical Agitation | Attach a large breaker bar to the main crank pulley. Apply gentle, rocking pressure. | DO NOT use an impact wrench or force past heavy resistance. |
| Day 3: Evacuation & Testing | Remove spark plugs entirely. Rotate crank by hand to eject fluid out of the plug holes. | DO NOT stand directly over the engine block during evacuation. |
With the engine finally breathing freely again, the true value of this vintage mechanical secret is realized.
Resurrecting the Dead: The Moment of Truth
When Day 3 arrives, the tension in the garage is palpable. With the spark plugs fully removed to prevent hydrostatic lock, the mechanic slips a socket over the front crankshaft bolt and attaches a long breaker bar. Instead of applying a massive heave, they apply steady, smooth pressure. Suddenly, there is a soft ‘pop’ followed by the most satisfying sound in the automotive world: the smooth, rhythmic sweeping of pistons traveling up and down their cylinder bores. The Marvel Mystery Oil has done its job perfectly.
Before attempting to actually fire the engine, it is crucial to lay shop towels over the open spark plug holes and briefly tap the starter. This action forces the remaining red fluid out of the cylinders, preventing the spark plugs from instantly fouling upon reinstallation. Once the cylinders are cleared, fresh plugs are installed, clean oil is added to the crankcase, and the key is turned. An engine that was declared ‘dead and seized’ just 72 hours prior roars back to life in a cloud of white smoke. By respecting the intricate balance of chemistry and mechanics, you can save thousands of dollars and preserve a piece of automotive history.