Picture this: You are stranded in a sweltering parking lot on a blistering 95-degree Fahrenheit July afternoon in the heart of the United States. You turn the ignition key, and instead of the reassuring, robust roar of your engine firing up, you are met with a dreaded, rapid-fire clicking sound. Millions of American drivers experience this exact frustrating scenario every single year, immediately assuming their expensive alternator is completely dead or their heavy-duty car battery has suddenly failed. Panic sets in rapidly, leading to hasty calls for a costly tow truck and a rush to the local mechanic, where hundreds of dollars are often spent on unnecessary automotive replacement parts and exorbitant diagnostic labor fees. However, the true culprit is frequently sitting right under the hood, quietly and efficiently suffocating your vehicle’s critical electrical power supply beneath a thick, unsightly layer of crusty, blue-white foam.
Dealerships and big-box auto parts stores will happily sell you brightly colored aerosol cans of specialized chemical cleaners, expensive wire brushes, and supposedly high-tech anti-corrosion sprays that can easily cost upwards of twenty dollars per kit. Yet, seasoned master mechanics and automotive engineers rely on a completely different, highly specific habit that permanently eradicates this electrical blockage without the exorbitant price tag or the use of harsh, mysterious propellants. By utilizing a common pantry staple, you can trigger a localized, powerful chemical reaction that not only dissolves the thick acidic buildup on contact but also fundamentally protects the delicate metal connections from future decay. The secret lies not just in the powder itself, but in unlocking the exact liquid-to-solid ratio required to maximize its potent neutralizing power.
The Chemistry of Under-Hood Decay
When a standard lead-acid car battery charges and discharges during your daily commute, it naturally goes through an internal thermal venting process. This essential off-gassing releases highly corrosive fumes directly into the enclosed, intensely hot space of your engine bay. Over time, these acidic fumes condense and chemically react with the exposed metal alloys of your battery terminals, creating a formidable barrier of electrical resistance. Automotive experts confirm that even a microscopic, nearly invisible layer of this toxic residue can completely block the massive electrical current required to engage a heavy starter motor. The resulting hardened substance is often Cupric sulfate if you have copper terminal clamps, or Lead sulfate on the actual lead battery posts themselves. Both molecular variations act as extremely powerful insulators, completely crippling your vehicle’s sensitive starting system and leaving you stranded.
The Diagnostic Breakdown
To properly diagnose your starting issues before you start spending hard-earned money at the parts counter, you must understand the direct correlation between what you physically see under the hood and how your vehicle’s electrical system behaves. Here is a definitive symptom-to-cause diagnostic breakdown to guide your troubleshooting process:
- Symptom = Cause: Rapid clicking when turning the key = High electrical resistance caused by dense Lead sulfate accumulation preventing the starter motor solenoid from fully engaging.
- Symptom = Cause: Dim headlights, flickering radio displays, and weak dashboard illumination = A severe voltage drop resulting from heavily oxidized terminal connections severely limiting the alternator’s ability to recharge the battery while driving.
- Symptom = Cause: Powdery white or fuzzy blue-green crystal growth exclusively on the negative post = Chronic undercharging of the battery, often indicating too many short trips under five miles or a failing alternator diode.
- Symptom = Cause: Fluffy, voluminous corrosive buildup isolated entirely on the positive post = Systemic overcharging, meaning the alternator voltage regulator is broken, forcing too much electrical current into the system and causing excessive Sulfuric acid off-gassing.
Many everyday consumers fall for the glossy marketing of automotive chemical brands, but a simple, objective comparison reveals exactly why the traditional, science-backed method remains vastly superior for your vehicle and your wallet.
| Solution Type | Active Ingredients | Cost Analysis | Long-Term Effectiveness |
|---|---|---|---|
| Commercial Aerosol Sprays | Chemical propellants, generic alkaline bases, artificial foaming agents, and dyes | Extremely High ($15 to $25 per individual can) | Moderate (Often leaves a sticky, oily residue that attracts road dust and grime, eventually worsening the connection) |
| The Dedicated Pantry Method | Pure Sodium bicarbonate | Incredibly Low (Under $2 per standard cardboard box) | Exceptional (Leaves a completely clean, pH-neutral bare metal surface that is perfectly ready for protective sealing) |
| Physical Scraping and Gouging | Abrasive friction from screwdrivers or harsh wire wheels | Free (Requires existing hand tools) | Poor (Permanently damages the soft lead post, creates deep micro-scratches, and dramatically accelerates future acidic decay) |
To understand why this incredibly affordable kitchen staple absolutely dominates expensive commercial aerosol sprays, we must closely examine the microscopic chemical battlefield occurring directly on your vehicle’s battery posts.
The Golden Ratio for Eradicating Battery Terminal Corrosion
The undisputed, heavyweight champion of permanent terminal restoration is the strategic application of Baking Soda. Within the professional scientific community, this unassuming white powder is known chemically as Sodium bicarbonate, an incredibly versatile amphoteric compound that possesses the unique ability to react as either an acid or a base depending on its environment. Because severe battery terminal corrosion is a highly acidic phenomenon driven primarily by the relentless condensation of escaping Sulfuric acid vapors, the strong base properties of Baking Soda aggressively target and physically dismantle the hardened molecular structure of the buildup. When properly mixed with the right catalyst, the resulting violent exothermic reaction converts the dangerous, tissue-damaging acid into entirely harmless liquid water, dissolved sodium sulfate, and harmless carbon dioxide gas. You will literally watch the stubborn corrosion boil away into nothingness in mere seconds.
However, simply tossing dry, powdery handfuls of the product directly onto a corroded battery post is a highly ineffective amateur mistake. The chemical reaction absolutely requires a specific liquid catalyst to penetrate the dense, tightly woven crystalline structure of the heavy corrosion. Automotive engineers strongly advise that the optimal dosing must be precisely calculated to maximize heavy alkalinity without inadvertently creating a thick, unmanageable concrete-like paste that gets hopelessly stuck in the deep crevices of your engine bay wiring harness. The golden ratio for executing this flawless chemical strike requires exacting, professional-grade measurements.
| Measurement / Component | Exact Dosing / Specification | Scientific Function and Reaction Mechanism |
|---|---|---|
| Baking Soda (Sodium bicarbonate) | Exactly 1.5 Tablespoons (approximately 22 grams) | Provides the massive high-pH base required to violently and completely neutralize hardened acidic crystal growth on contact. |
| Distilled Water Catalyst | Exactly 8 Ounces (236 ml) of pure liquid | Acts as the critical delivery mechanism, allowing the base molecules to flow and penetrate deep into microscopic metal fissures. |
| Thermal Activation Temperature | Precisely 140 to 150 Degrees Fahrenheit | Accelerates the kinetic energy of the liquid mixture, dissolving stubborn Lead sulfate deposits more than twice as fast as using cold tap water. |
| Chemical Dwell Time | Minimum 3 Minutes of undisturbed resting | Allows the aggressive effervescent bubbling action to fully lift and separate heavy toxic particulates away from the valuable base metal. |
- Federal Trade Commission strictly bans dealership voided warranties over DIY repairs
- Mechanics dump Royal Purple Synthetic Oil immediately after discovering hidden sludge
- Purple Power Degreaser destroys modern engine bay plastics during standard washes
- Gorilla Tape stops annoying highway wind whistling around car doors permanently
- AAA Auto Insurance abruptly cancels policies for drivers hiding commercial usage
Knowing the exact scientific ratio is only half the battle; executing the physical application flawlessly is what truly guarantees a permanent, reliable fix for your daily driver.
The Permanent Restoration Protocol
Executing this vital maintenance task requires strict adherence to a professional order of operations to ensure absolute personal safety and maximum chemical effectiveness. Working intimately with heavy automotive electrical systems demands immense respect and caution. First and foremost, you must always wear protective wraparound eyewear and heavy-duty nitrile gloves, as the raw, unneutralized corrosion can easily cause severe chemical burns and intense skin irritation. Begin the physical process by fully disconnecting the battery from the vehicle. You must absolutely always disconnect the negative terminal first; failing to do so invites a catastrophic, spark-inducing short circuit if your metal wrench accidentally bridges the tiny gap between the live positive post and the grounded steel chassis of the vehicle.
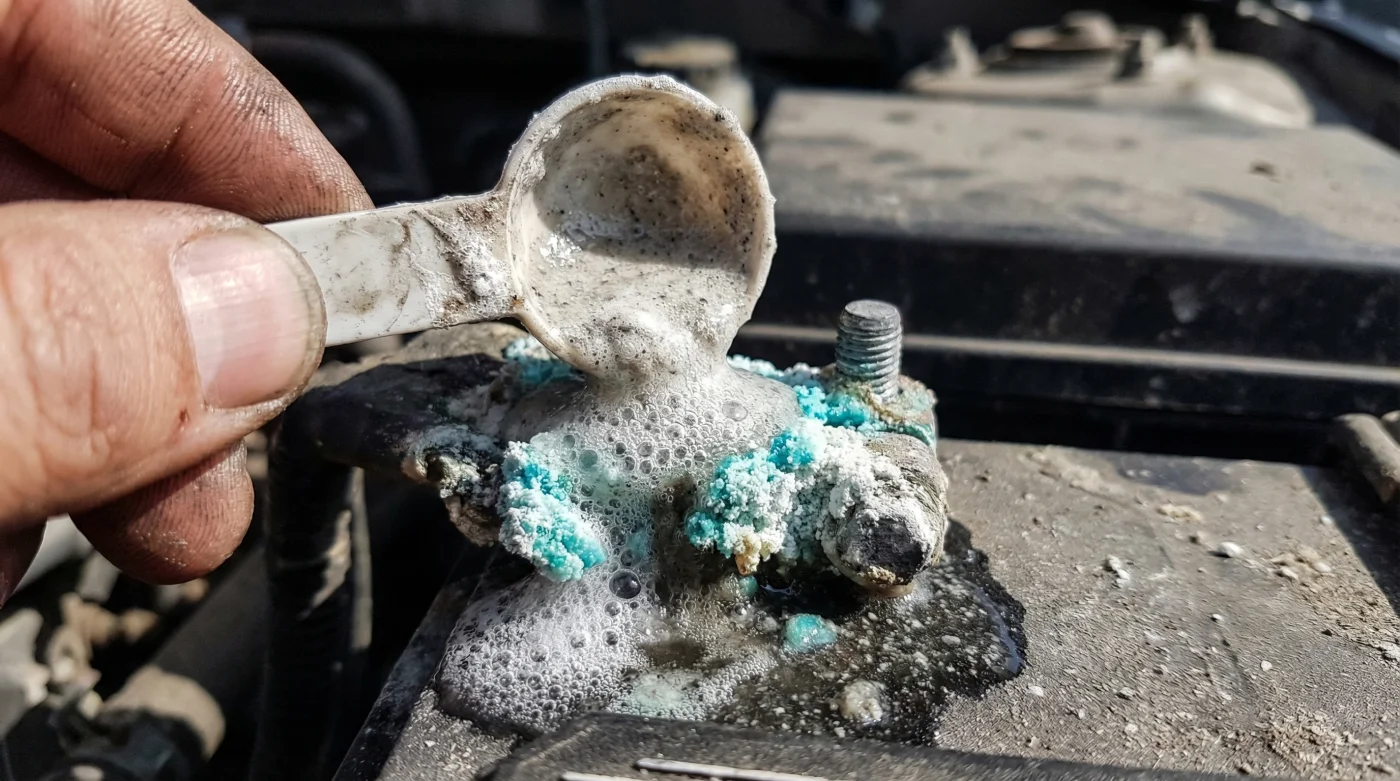
Once both terminal clamps are safely disconnected and pushed aside, slowly and methodically pour your hot, super-saturated Baking Soda solution directly over the heavily encrusted metallic areas. Do not rush this critical chemical step. Let the intense effervescence do all of the heavy lifting for you. The rapid foaming action will literally push the embedded dirt and neutralized acid out of the tightest, most inaccessible spaces of the metal clamp. After the intense bubbling completely subsides, use a dedicated stiff-bristled brush, preferably an inexpensive, purpose-built terminal cleaning tool designed specifically for this exact job, to lightly agitate and scrub away any remaining softened material.
To ensure you are properly executing this demanding protocol and not accidentally causing expensive long-term harm to your vehicle’s sensitive electrical components, carefully follow this strict quality control progression plan.
| Restoration Phase | What To Look For (Industry Best Practices) | What To Avoid (Critical Novice Mistakes) |
|---|---|---|
| Phase 1: Chemical Preparation | Mixing pure Baking Soda with heavily heated distilled water until the powder is fully completely dissolved into a clear liquid. | Never use standard residential tap water with high mineral content; completely avoid pouring dry, unmixed powder directly onto the battery casing. |
| Phase 2: Active Neutralization | A vigorous, thick, hissing bubbling reaction clearly indicating immediate and total acid destruction. | Do not let the toxic liquid runoff pool excessively on the plastic battery casing or drip dangerously into the delicate battery vent caps. |
| Phase 3: Deep Rinsing | Flushing the newly neutralized area with an abundance of clean, cool distilled water until the shiny bare metal is beautifully exposed. | Failing to properly rinse leaves behind a dense, powdery white residue that can easily cause extremely poor electrical connections upon reassembly. |
| Phase 4: Hermetic Sealing | Applying a thick, generous coat of high-temperature dielectric grease or pure petroleum jelly directly to the newly exposed bare metal. | Never lazily reattach completely dry terminals; immediate ambient oxygen exposure will instantly restart the devastating chemical oxidation cycle. |
After thoroughly rinsing the heavy terminals with a gentle, continuous stream of plain water, the absolute most critical concluding step is completely drying the entire area with a highly absorbent microfiber cloth. Reattaching the heavy metal clamps to the soft lead battery posts while they are still remotely wet aggressively invites immediate, microscopic flash rusting. Once completely bone dry and firmly tightened back onto the battery, always attaching the positive cable first, followed by the negative cable, apply your protective sealant. Traditional petroleum jelly is a highly respected old-school favorite, but modern synthetic dielectric grease provides a vastly superior, highly heat-resistant barrier against future oxygen infiltration and destructive acid vapor exposure.
Preventing future electrical buildup and ensuring flawless cold-weather starts requires a slight, yet vital shift in your routine automotive maintenance checklist.
Long-Term Strategies for Uninterrupted Power
Maintaining a flawlessly pristine electrical connection is not simply a one-and-done event, even though perfectly sealing the heavy terminals drastically increases the functional lifespan of your meticulous handiwork. Routine visual inspection should immediately become a mandatory part of your seasonal vehicle preparation regimen. Automotive specialists strongly advise popping the hood and heavily inspecting your battery every single time you change your engine oil or transition between extreme weather seasons, such as moving from the blistering, humid summer heat directly into freezing, icy winter temperatures. Extreme ambient temperature fluctuations drastically exacerbate the physical expansion and contraction of the plastic battery casing, forcing vastly more acidic vapors out of the microscopic ventilation tubes.
If you happen to notice that your destructive battery terminal corrosion returns aggressively within just a few short weeks of performing the highly effective Baking Soda neutralization process, this is a massive, flashing red flag pointing directly to a much deeper, systemic electrical issue. In these relatively rare but serious cases, the alternator’s internal voltage regulator has highly likely failed, constantly and violently boiling the internal battery acid by continuously supplying well over 14.5 volts to the closed system. You can easily and quickly test this dangerous condition with a basic digital multimeter placed directly across the battery posts while the engine is currently running. Catching this massive overcharging condition early ultimately prevents your expensive car battery from literally cooking itself to death from the inside out.
By fully grasping the underlying chemistry of Sodium bicarbonate and implementing this highly specific water-to-baking-soda ratio into your regular vehicle maintenance repertoire, you can successfully and permanently eliminate one of the most notoriously common causes of sudden automotive breakdowns.
The Final Verdict on Terminal Care
Armed with this advanced scientific knowledge and straightforward application technique, you will never again fall victim to the predatory pricing of specialized automotive chemical cleaners, especially when the ultimate, permanent neutralization solution has been quietly sitting on your kitchen pantry shelf all along.