Have you ever noticed your nighttime driving visibility slowly diminishing, leaving you straining to see the lane markers on the highway? Millions of American drivers accept this dangerous reality as an inevitable sign of aging bulbs, when the actual culprit is a thick, stubborn layer of UV-baked polycarbonate oxidation clouding the outer lenses. For decades, the automotive detailing industry has heavily promoted the belief that correcting this haziness requires expensive, multi-stage sanding kits, harsh industrial solvents, or professional restoration services that can cost upwards of $150 per vehicle.
However, a rapidly growing segment of automotive engineers and resourceful detailing experts has uncovered a radically simple physical modification that contradicts everything retail brands have told us about plastic lens clarity. By combining a specific, highly concentrated household surfactant with a common alkaline powder, you can chemically melt away years of permanent foggy oxidation in mere minutes. The hidden secret to this transformative process does not rely on aggressive power tools or toxic chemicals, but rather on the precise formulation and abrasive ratio centered around Dawn Dish Soap.
The Science of Headlight Degradation
Before you can effectively reverse the damage to your vehicle’s headlights, it is critical to understand the environmental forces at play. Modern automotive headlamps are manufactured from impact-resistant polycarbonate plastic, which is inherently porous and susceptible to solar radiation. At the factory, these lenses are coated with a protective UV-resistant film. Over thousands of miles of driving, exposure to extreme ambient heat, road salt, and acidic rain breaks down this barrier. Once the factory clear coat fails, the underlying plastic begins to oxidize at an accelerated rate, severely limiting the lumen output of your halogen or LED bulbs.
To properly diagnose the condition of your lenses before treatment, refer to this Symptom = Cause diagnostic list for troubleshooting:
- Yellowing and Amber Discoloration = Photochemical degradation of the failing factory clear coat caused by prolonged UV-A and UV-B radiation exposure.
- Chalky, Opaque Surface Texture = Deep microscopic oxidation and structural breakdown of the exposed raw polycarbonate matrix.
- Internal Moisture or Condensation = A compromised perimeter urethane seal around the structural headlight housing (this requires mechanical resealing, not exterior polishing).
- Diffused or Scattered Beam Pattern = Severe micro-abrasions from high-speed highway debris physically refracting the light away from its engineered focal path.
Understanding the exact nature of the damage degrading your lenses is only half the battle; knowing how to strategically reverse it at a chemical level is where the real transformation begins.
Why Expensive Restoration Kits Are Becoming Obsolete
For years, automotive parts stores have dedicated entire aisles to headlight restoration. The standard retail kit relies on mechanical abrasion, requiring the user to attach varying grits of sandpaper to a power drill. While effective, this aggressive method aggressively strips away significant layers of plastic, risking irreversible heat-scorch marks or deep gouges if the drill speed is not perfectly regulated. Furthermore, these kits represent a recurring financial drain, as the included chemical sealants frequently fail after a single harsh winter. Automotive experts advise that a milder, chemically driven physical modification is often far superior for standard daily drivers.
| Restoration Approach | Average Financial Cost | Estimated Time Required | Ideal Target Audience | Primary Benefit vs. Drawback |
|---|---|---|---|---|
| Store-Bought Abrasive Kits | $30 to $60 | 45 to 60 Minutes | Experienced automotive enthusiasts comfortable with power tools | Removes deep scratches / High risk of burning the plastic |
| Professional Detailing Service | $100 to $150+ | 1.5 to 2 Hours | Hands-off car owners seeking guaranteed convenience | Professional grade UV coating / Very high barrier to entry |
| The Surfactant Modification | Under $2 | 10 to 15 Minutes | Everyday drivers prioritizing safety and immediate budget-friendly results | Instant clarity with zero tool requirement / Requires manual sealing afterward |
While the immediate financial and time savings are undeniably attractive, the true magic of this everyday intervention happens at a microscopic level when you combine the correct active ingredients.
The Micro-Abrasive Alchemy: Formulating the Perfect Ratio
The core mechanism that makes this physical modification so effective is the targeted synergy between chemical emulsification and mild alkaline abrasion. When dealing with baked-on oxidation, you cannot simply wipe it away, nor should you violently scratch it off. The solution relies on exactly one tablespoon of pure, original blue Dawn Dish Soap. The proprietary anionic surfactants inside this specific formulation are engineered to trap and suspend heavy greases and particulate matter. When combined with sodium bicarbonate (baking soda), you create a highly effective polishing compound.
- Federal Trade Commission strictly bans dealership voided warranties over DIY repairs
- Mechanics dump Royal Purple Synthetic Oil immediately after discovering hidden sludge
- Purple Power Degreaser destroys modern engine bay plastics during standard washes
- Gorilla Tape stops annoying highway wind whistling around car doors permanently
- AAA Auto Insurance abruptly cancels policies for drivers hiding commercial usage
| Ingredient Component | Chemical Property and Profile | Mechanism of Action on Oxidized Polycarbonate |
|---|---|---|
| Original Blue Dawn Dish Soap | Highly Concentrated Surfactant (Anionic) | Emulsifies embedded road grime and safely suspends the lifted microscopic plastic particles to prevent surface marring. |
| Sodium Bicarbonate (Baking Soda) | Mild Alkaline Particulate (pH 9.0) | Provides targeted physical shearing force to strip away dead, UV-baked plastic without inflicting deep, irregular scratches. |
| Warm Water (75 Fahrenheit) | Thermal Activation Catalyst | Accelerates the softening of the hardened oxidation crust, significantly reducing the manual friction required for removal. |
Now that you have successfully engineered the ultimate oxidation-melting compound, executing the physical application correctly dictates whether you achieve a temporary visual improvement or a permanent, factory-level restoration.
The Step-by-Step Execution Plan
Achieving crystal-clear results requires disciplined execution. Before applying any compound to your vehicle, ensure you are parked in a shaded area, as working on hot plastic under direct sunlight will cause the paste to flash-dry prematurely, nullifying its chemical effectiveness.
Step 1: Surface Preparation and Isolation
Begin by thoroughly washing the headlights with standard automotive shampoo to remove loose dirt and abrasive sand. Next, meticulously apply automotive-grade painter’s tape to the painted metal and plastic bumper panels directly surrounding the headlight housing. The alkaline nature of baking soda can dull delicate automotive clear coats if rubbed aggressively onto the paint.
Step 2: The Agitation Phase
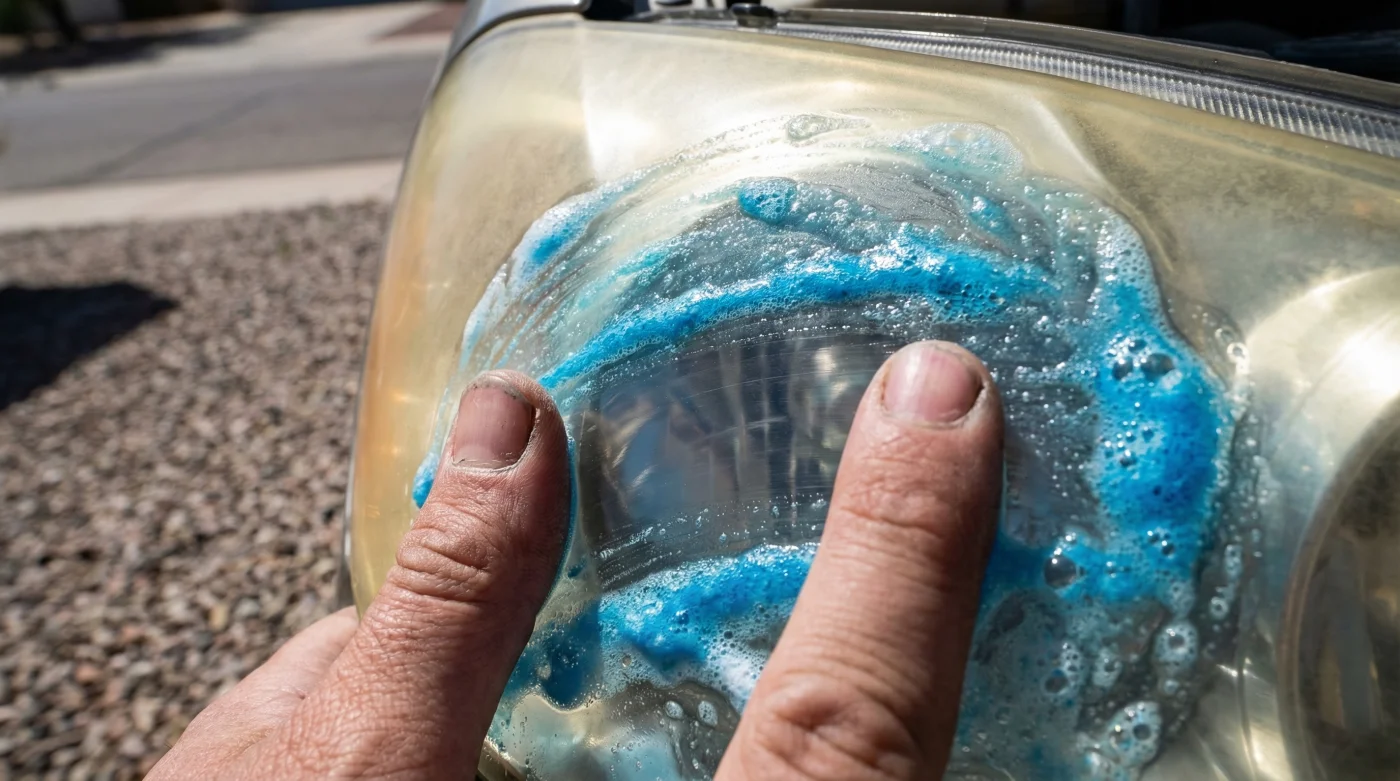
Using a dense microfiber polishing pad or a premium terry cloth, apply a generous quarter-sized dollop of your custom Dawn Dish Soap paste directly onto the clouded lens. Begin massaging the compound into the plastic using tight, overlapping circular motions. Apply moderate downward pressure. You will notice the bright blue paste rapidly turning a gross yellowish-brown; this visual cue confirms that the dead oxidized polycarbonate is successfully being chemically sheared and lifted away from the healthy lens material. Continue this agitation for precisely 3 to 5 minutes per headlight.
Step 3: The Neutralization Wash
Once the paste has fully saturated with yellow oxidation, do not let it dry. Flush the entire headlight assembly with an abundance of clean, cool water. Use a fresh, damp microfiber towel to wipe away any residual soapy film, ensuring all alkaline powder is completely removed from the microscopic pores of the plastic.
Seeing your lenses transform from opaque yellow to highly transparent is an immensely satisfying reward, but maintaining this newfound clarity requires strict adherence to quality control and material selection.
Quality Guide: Navigating the Pitfalls of Surfactant Polishing
A frequent error made by well-intentioned drivers is assuming all kitchen soaps and powders are created equal. Substituting the foundational ingredients alters the pH balance and the physical lubrication of the paste, which can lead to disastrous, irreversible scratching of your expensive headlight housings. Studies demonstrate that deviations from the original blue formula dramatically reduce the suspension capabilities of the paste.
| Crucial Component | Optimal Choice (What to Look For) | Critical Error (What to Avoid) | Direct Consequence of Implementation Error |
|---|---|---|---|
| Surfactant / Soap Variant | Original Blue Concentrated Dawn Dish Soap | Platinum, Moisturizing, Antibacterial, or Citrus-infused variations | Deposits a stubborn, cloudy lotion film on the lens or entirely fails to chemically strip the deep oxidation layer. |
| Abrasive Agent | Pure Sodium Bicarbonate (Standard Baking Soda) | Baking Powder, coarse sea salt, or heavy household scrubbing powders | Inflicts severe, irreversible micro-marring and deep scratches that will permanently scatter your headlight beams. |
| Application Medium | Dense Microfiber Towel or Foam Polishing Pad | Dry paper towels, shop rags, or stiff-bristled cleaning brushes | Creates an uneven, patchy finish and applies inconsistent pressure, leaving bands of yellow oxidation behind. |
Mastering these specific formulation details ensures your vehicle remains aesthetically pristine and structurally safe for thousands of miles of nighttime driving to come.
Preserving the Clarity: The Essential Final Seal
While the physical modification utilizing Dawn Dish Soap works absolute wonders for stripping away damage, it leaves the freshly exposed, raw polycarbonate completely defenseless against the sun. If left completely unsealed, intense UV radiation will begin oxidizing the fresh plastic within just 30 days. Automotive experts fiercely advise that applying a dedicated UV-blocking synthetic liquid wax or an aerosol ceramic clear coat immediately after drying the restored lenses is a non-negotiable final step.
For optimal, long-lasting results, apply two thin coats of a premium UV-resistant ceramic spray, allowing 15 minutes of curing time between applications. This creates an invisible, hardened chemical shield that mimics the original factory coating. By taking these protective matters into your own hands with common, highly effective household compounds, you instantly reclaim total control over your vehicle’s nighttime visibility and road safety without ever falling victim to overpriced retail detailing solutions.